7-Point Checklist: Preparing Your Property for Solar Panel Installation
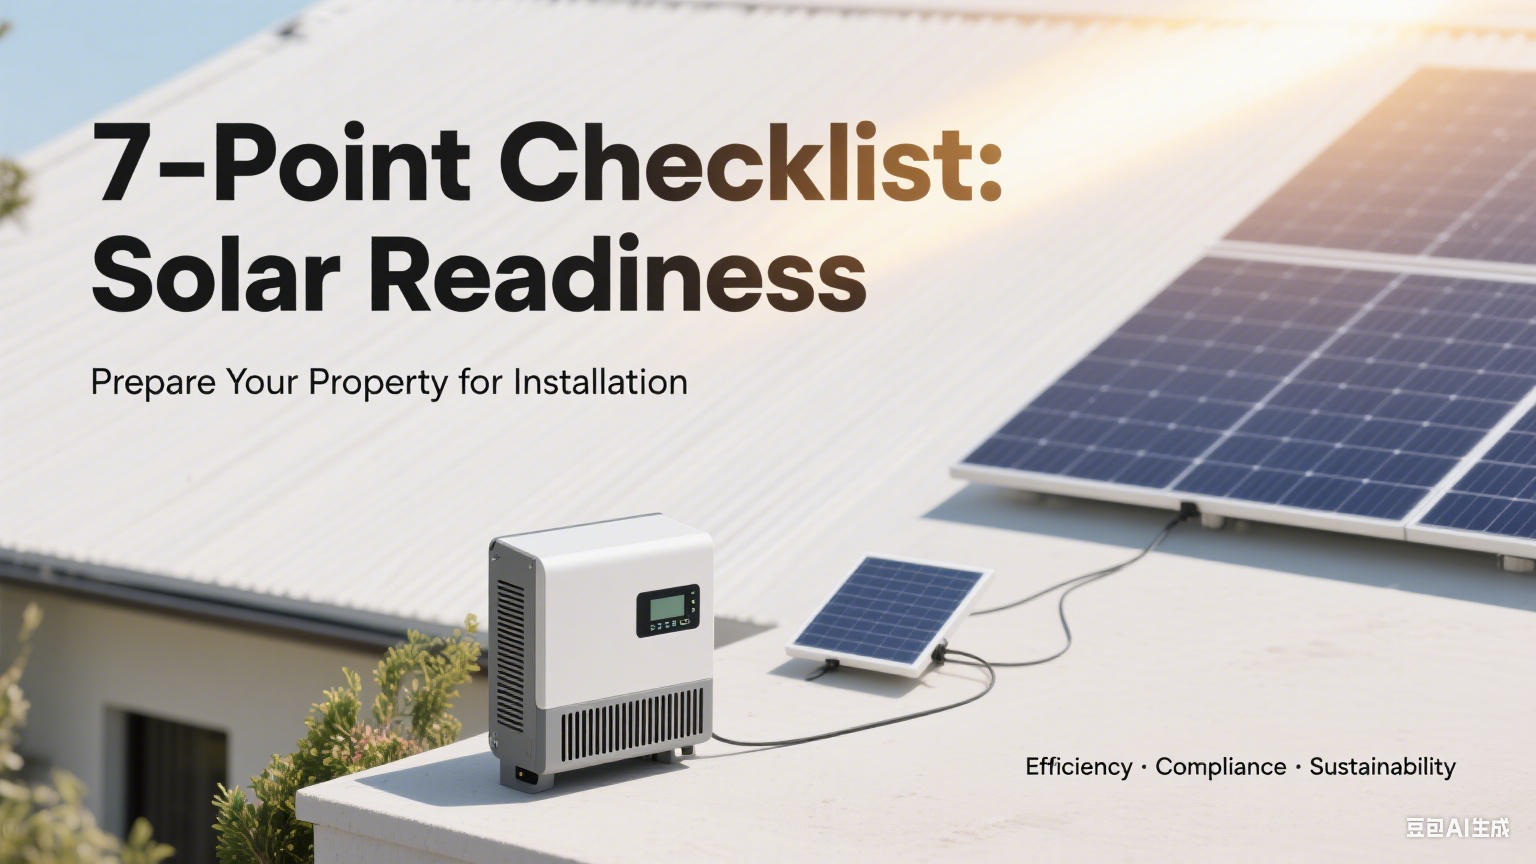
Preparing your property for solar panel installation involves careful planning and assessment to ensure a smooth and successful project. Here’s a comprehensive checklist to guide you through the process:
| Checklist Item | Key Actions |
|---|---|
| 1. Assess Energy Needs | - Analyze 12 months of utility bills for usage patterns. - List appliances with wattage/usage to calculate requirements. - Account for future needs (e.g., electric vehicles). |
| 2. Evaluate Property | - Check roof condition (replace if needed) and weight capacity. - Ensure optimal orientation (south in Northern Hemisphere) and tilt. - Assess shading from trees/buildings with tools like solar pathfinders. |
| 3. Check Local Regulations | - Review building codes, zoning laws, and HOA rules. - Obtain necessary permits (electrical, structural) and utility interconnection agreements. |
| 4. Choose the Right Installer | - Select certified installers (e.g., NABCEP) with positive reviews. - Verify comprehensive warranties and maintenance support. |
| 5. Select Quality Components | - Pick high-efficiency panels (monocrystalline/thin-film) and MPPT inverters. - Choose durable batteries (lithium-ion) and weather-resistant mounting systems. |
| 6. Prepare Installation Site | - Clear debris/obstacles; mark mounting/wiring points. - Have safety equipment (glasses, harness) ready for roof work. |
| 7. Plan Maintenance & Monitoring | - Schedule regular inspections and panel cleaning. - Invest in real-time monitoring tools to track performance. |
1. Assess Your Energy Needs
- Review Utility Bills: Analyze your past 12 months of energy consumption to determine your average daily and peak usage. This data will help you size your solar system correctly.
- Identify Essential Appliances: List all the appliances and devices you plan to power with solar energy. Note their wattage and typical usage hours to calculate total power requirements.
- Consider Future Needs: Think about any future expansions or additional energy demands, such as electric vehicles or new appliances.
2. Evaluate Your Property
- Roof Condition: Inspect your roof to ensure it is in good condition and can support the weight of solar panels. If your roof needs replacement, consider doing it before installing solar panels to avoid additional costs later.
- Orientation and Tilt: Ensure your roof or installation area faces south (in the Northern Hemisphere) and has an optimal tilt angle close to your latitude. This maximizes sunlight exposure.
- Shading Analysis: Identify any obstructions like trees, chimneys, or nearby buildings that could cast shadows on the panels. Use tools like a solar pathfinder to assess shading patterns throughout the day.
3. Check Local Regulations and Permits
- Building Codes and Zoning Laws: Familiarize yourself with local building codes, zoning laws, and any specific regulations regarding solar installations in your area.
- Permits: Obtain necessary permits from your local building department. This may include electrical and structural permits.
- HOA Approval: If you live in a community with a Homeowners Association (HOA), check their regulations and obtain any required approvals.
- Utility Company Agreement: For grid-tied systems, contact your utility company to discuss interconnection requirements and obtain any necessary agreements.
4. Choose the Right Installer
- Experience and Certifications: Select an installer with a proven track record and relevant certifications, such as NABCEP (North American Board of Certified Energy Practitioners).
- Warranties and Support: Ensure the installer offers comprehensive warranties for both labor and equipment. Ask about their maintenance and repair services.
- Customer Reviews: Read reviews and testimonials from previous customers to gauge the installer’s reliability and quality of work.
5. Select High-Quality Components
- Solar Panels: Opt for high-efficiency panels, such as monocrystalline or advanced thin-film panels, to maximize energy production.
- Inverters: Choose inverters with Maximum Power Point Tracking (MPPT) to ensure optimal power extraction. Ensure they are compatible with your panels and battery storage system (if applicable).
- Battery Storage (if needed): If you plan to store excess energy, select high-quality batteries like lithium-ion for durability and efficiency.
- Mounting System: Ensure the mounting system is sturdy and designed to withstand local weather conditions. Consider materials like aluminum or galvanized iron for durability.
6. Prepare the Installation Site
- Clear the Area: Remove any debris, vegetation, or obstacles from the installation site. Ensure the area is clean and accessible for technicians.
- Mark Installation Points: Clearly mark the locations for panel mounting, wiring, and other components to avoid confusion during installation.
- Safety Measures: Ensure you have all necessary safety equipment, including safety glasses, gloves, a hard hat, and a safety harness for roof work.
7. Plan for Maintenance and Monitoring
- Regular Inspections: Schedule regular inspections to check for any damage, wear, or shading issues. Address any issues promptly to maintain peak performance.
- Cleaning Routine: Develop a routine for cleaning your solar panels to remove dust, dirt, and debris that can reduce efficiency.
- Monitoring Tools: Invest in monitoring tools to track your system’s performance in real-time. This helps identify inefficiencies and ensures your system is operating optimally.
Conclusion
Preparing your property for solar panel installation involves careful planning, assessment, and compliance with local regulations. By following this 7-point checklist, you can ensure a smooth installation process and maximize the efficiency and longevity of your solar system. Whether you’re a homeowner or a business owner, solar energy offers a sustainable and cost-effective solution for your energy needs.
For more information on photovoltaic technology, please visithttps://youtu.be/JB56vgBNr6E?si=48ZjW1I9exvg7s-o for detailed content.